Pipedrive and Google Analytics Integration
for Wordpress and Contact Form 7
How does Pipehook work
Heyhey! Good to digitally meet a fellow analyzer. You are probably thinking is the time put into it worth the trouble. Fear not! I try to be as detailed as possible to help you through all the necessary steps to get going.
And there is TWO good news:
– You can try it out with our free version (no credit card needed) that works up to 30 form submissions per month. After that, it still sends your data to Pipedrive but without the UTM data.
– You only need to set it up once. If you decide to become a paid user and download the premium version your setup will stay the same.
And all in all – it takes some 15 minutes of effort but might have a big impact on your advertising ROI.
The only downside at the moment? It works with WordPress and Contact Form 7 only. If you need help with changing your forms let us know, let’s figure something out.
So – let’s dive into the three most important questions:
– How should I set Pipehook up?
– How should I set my Goals (or events in GA4)?
– How can I upgrade my free plugin to the Premium version?
How should I set Pipehook up
First of all, you need to decide if you try out our free version first or start with the premium one.
It’s really easy to upgrade it later, your data will be transported from the free version to the premium one.
After you receive the .zip file you need to upload it in the Plugins section.
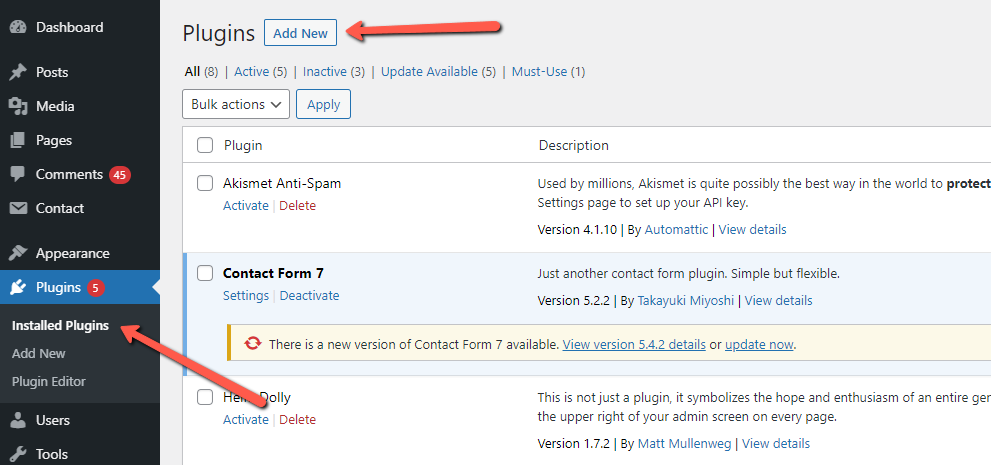
After the installation process, you need to activate it and you should be able to see this new menu item on your left sidebar.
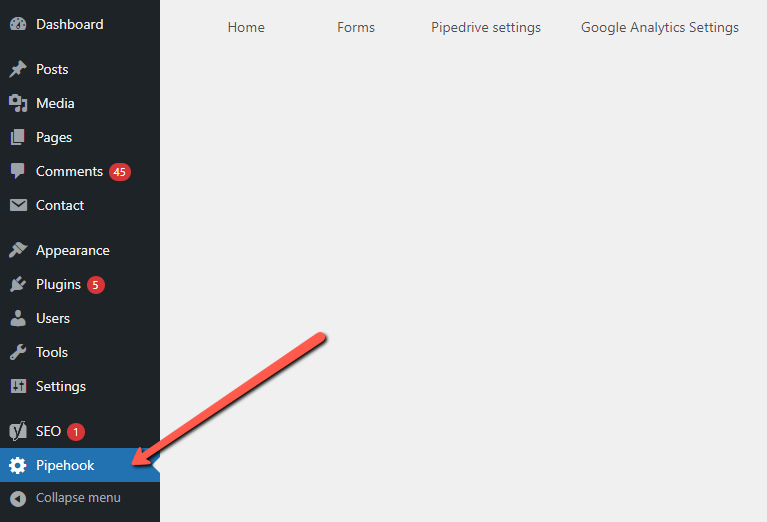
At the Home tab, we have also written out the steps you need to follow to insert all the important information.
The important steps are:
1. Insert Google Analytics data
2. Add a new webhook to your Pipedrive
3. Insert Pipedrive API token and URL and generate new custom fields
4. Configure your contact form
5. Great! Now you can analyze your sale instead of leads
But we’ll dive deeper here.
1. Insert Google Analytics data
Let’s start with Google Analytics. Click on the Google Analytics Settings tab and you’ll see something like this:
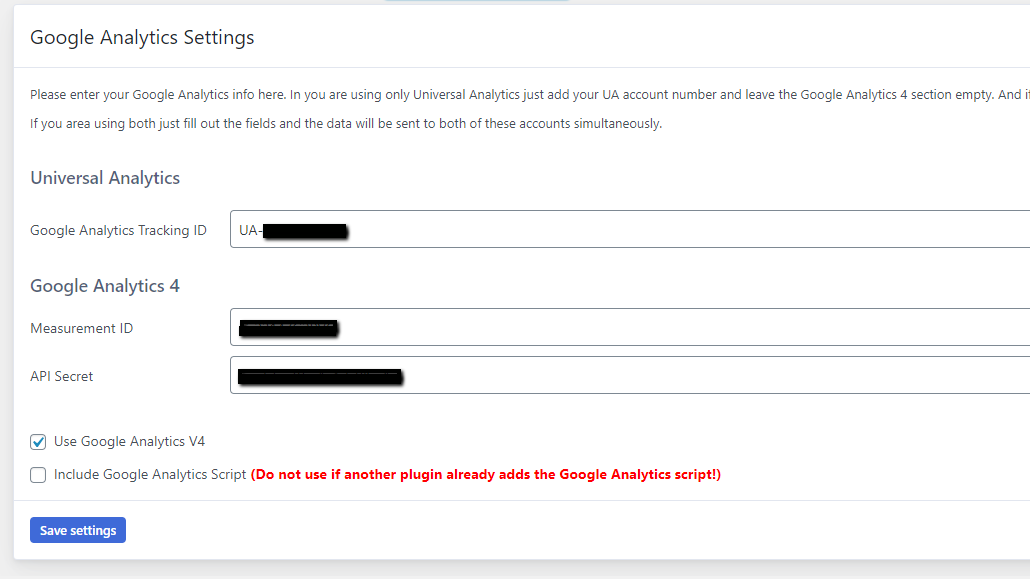
For us to be able to send information to your Google Analytics later we need to know the Tracking ID for the Universal Analytics account (it should look like this: UA-XXXXXXXXX-X). And if you are a user of Google Analytics 4 already you can also tick the box and enter the Measurement ID and API secret for it. You can find those from Property – Data Streams:

You probably already have Google Analytics installed so do not tick the box for “Include Google Analytics Script”. But – we kept it there just in case.
Do not forget to click the Save settings button 🙂
2. Add a new webhook to your Pipedrive
Next up – Pipedrive and webhook. We need this one to be able to communicate with Pipedrive when sending event data. Don’t worry, we only use it for the plugin to work, we don’t have access to your client information. Or anything in your Pipedrive account for that matter.
Log into your Pipedrive account and under the Tools and apps section (from the upper right corner) you can find Webhooks in the menu:
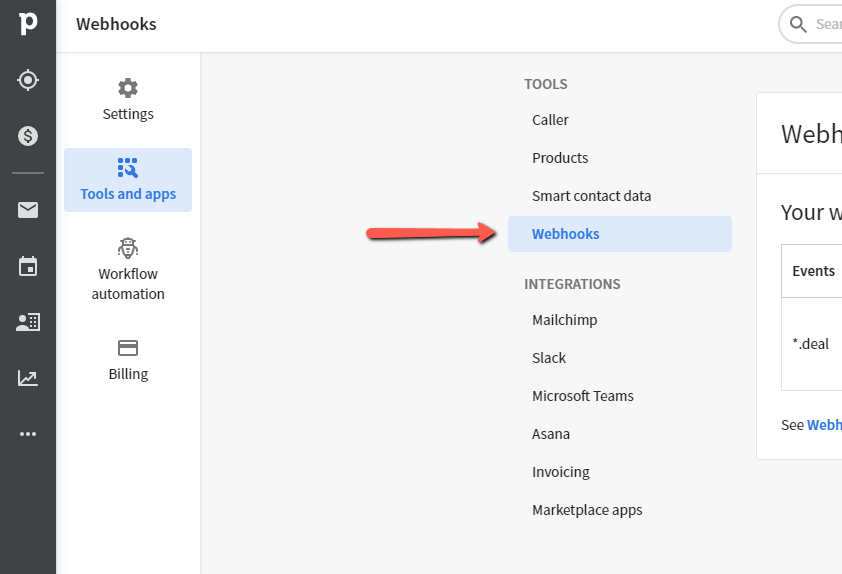
Click on the Create new webhook button in the right corner.
Choose the Event action as “*” and Event object as “Deal”. And then enter the Endpoint URL from your Home tab. It should look something like this then:
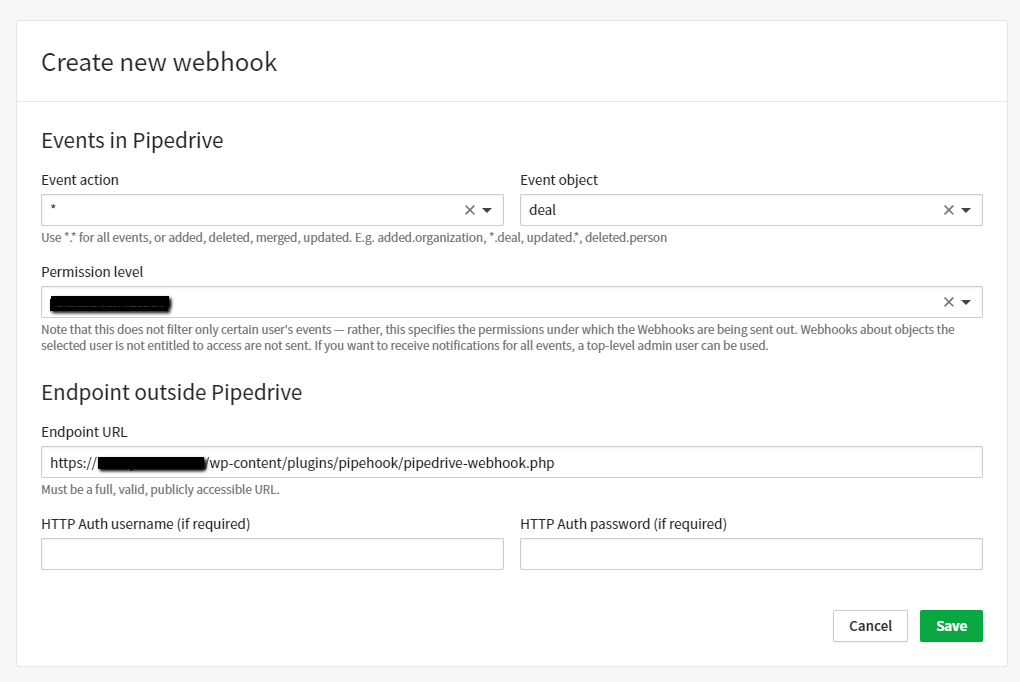
Again – don’t forget to Save it before leaving.
3. Insert Pipedrive API token and generate new custom fields
Next, we need to link the Pipehook plugin with Pipedrive API so we can generate new custom fields and send the most important data into these.
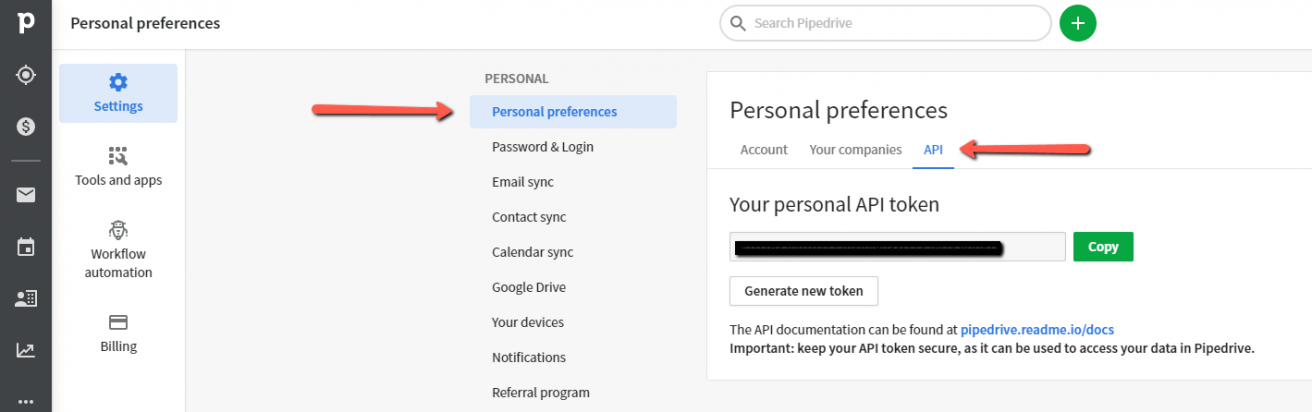
You need to enter the API token and API URL into the fields. You can find your API token from Settings -> Personal preference -> API. If you have copied the API token do not change it afterward.
API URL should always be https://api.pipedrive.com/v1/.
Make sure to click the Update buttons at the end of the fields.
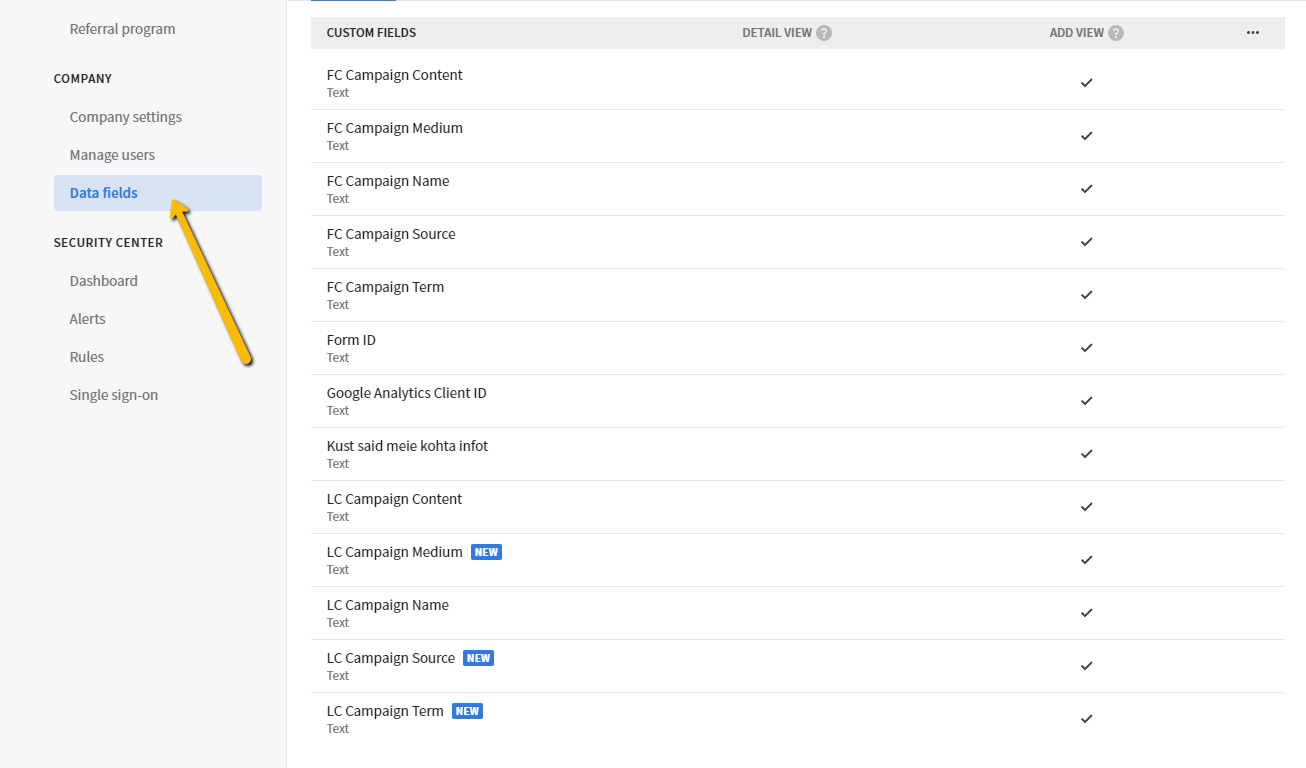
Then – let’s create some fields we need to send data into Pipedrive. Like First Campaign Source or Last Landing Page.
You can do it with one click on the “Add new fields form” – this will generate all the necessary fields and you can also check these in your Pipedrive account:
And – if you have some custom fields already made in Pipedrive you’d like to link some form fields to you can also load fields from Pipedrive by clicking the button.
At the very bottom, you can generate new custom fields that will also be visible in Pipedrive later. You might need this if you have many fields on your contact form that need a new field in Pipedrive to send info into (eg Pipedrive do not have a field for “Where did you hear about us” information so you have to create a new custom field for that if you want to see that information in Pipedrive, too).
4. Configure your contact form
Almost there!
Now we can send and get data between Google Analytics and Pipedrive. But which data to send and get? Let’s set this thing up as well.
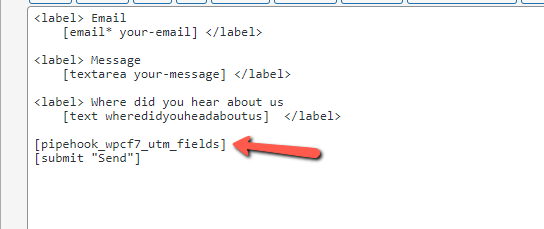
Before moving to the Forms tab let’s insert one important shortcode into our contact form.
You need to add the following shortcode to the form you want the link to your Pipedrive: [pipehook_wpcf7_utm_fields]
Just open Contact, then the form, and paste it to the end of the fields.
Now go back to Pipehook and click on the Forms tab in the plugin view. Then choose the right form. You should see something like this:
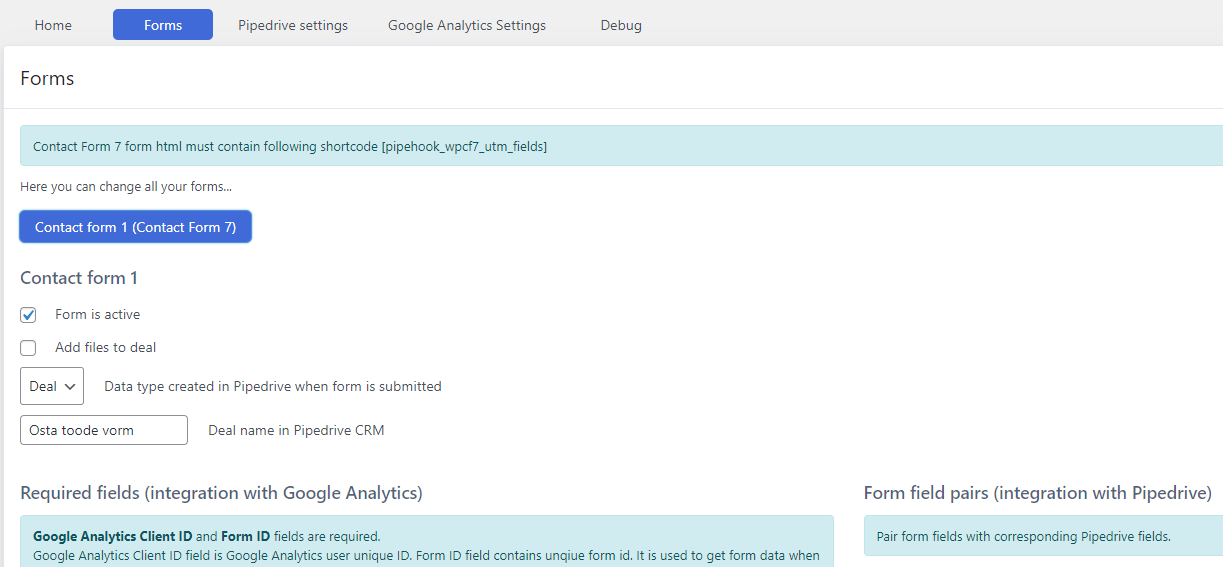
There is a lot of information but it will be logical in a few minutes.
Forms view includes five sections
a. Settings
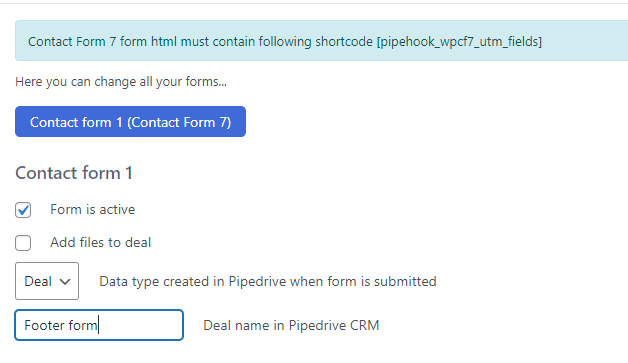
Here you can decide if the plugin should work, if you need to add files to the deal, which kind of data will be created in Pipedrive, and which deal name will be visible in Pipedrive.
b. Required fields

We need to link two important fields to the Pipedrive fields we created previously. Names of both fields should be the same, just pick the right ones from the dropdown menu.
c. Form field pairs
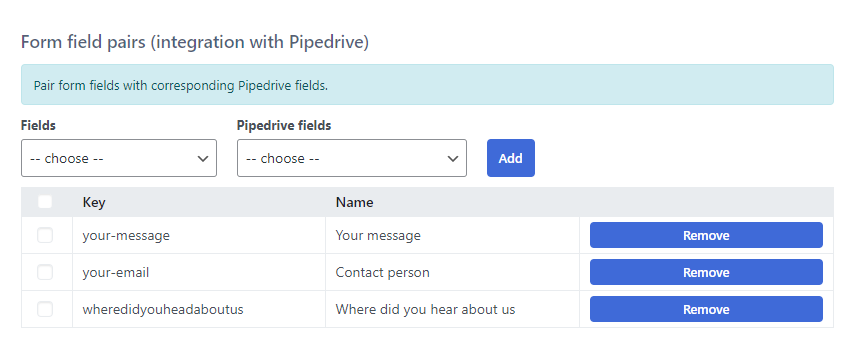
Here you can link your form fields to the Pipedrive fields so the information will end up in the right places. You can find Pipedrive’s own fields at the beginning of the list and newly created custom fields at the bottom of the dropdown list.
And remember – if you need a field you cant find here you can create it either in Pipedrive or from the Pipedrive view.
d. Name your events
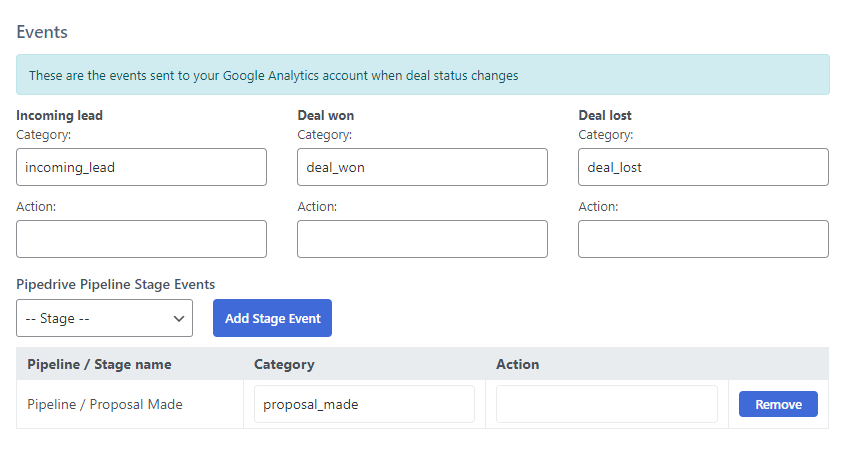
Here you can name the three main events as well as create new ones for your pipeline stage events.
We recommend these names:
– incoming_lead (is sent when the form is submitted)
– deal_won (is sent when you mark a deal WON in Pipedrive)
– deal_lost (is sent when you mark a deal LOST in Pipedrive)
e. Custom field pairs
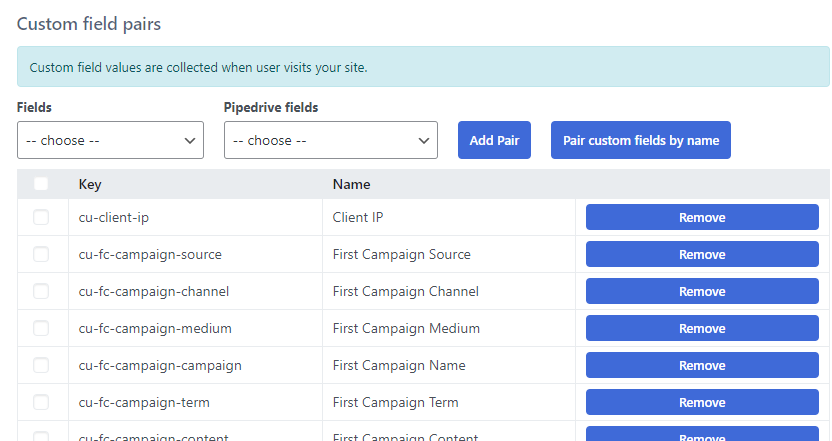
And lastly – we also need to link all the new fields to the important fields we need to get the UTM data when someone submits the form. We have tried to make it as easy as possible so just click the “Pair custom fields by name” button and all of these will be created for you.
DO NOT forget to save the view. You can find the SAVE button either from the bottom of the page or from the top.
5. Testing
You are all set. It’s time to test it out. Go to your website and fill out the form. You should be able to see the inquiry in your Pipedrive Pipeline, filled with source/medium information. If you came to your website directly most of the fields are empty of course.
Now enter the lead a value and mark it as Won or Lost. You should be able to see a new event in Google Analytics (check Real-Time view for instant feedback) with the attached value.
If you have any problems or questions do not hesitate to contact us at support@pipehook.com. If necessary will try to fix it for you.